
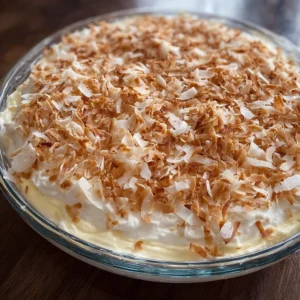
Butterfinger Pie
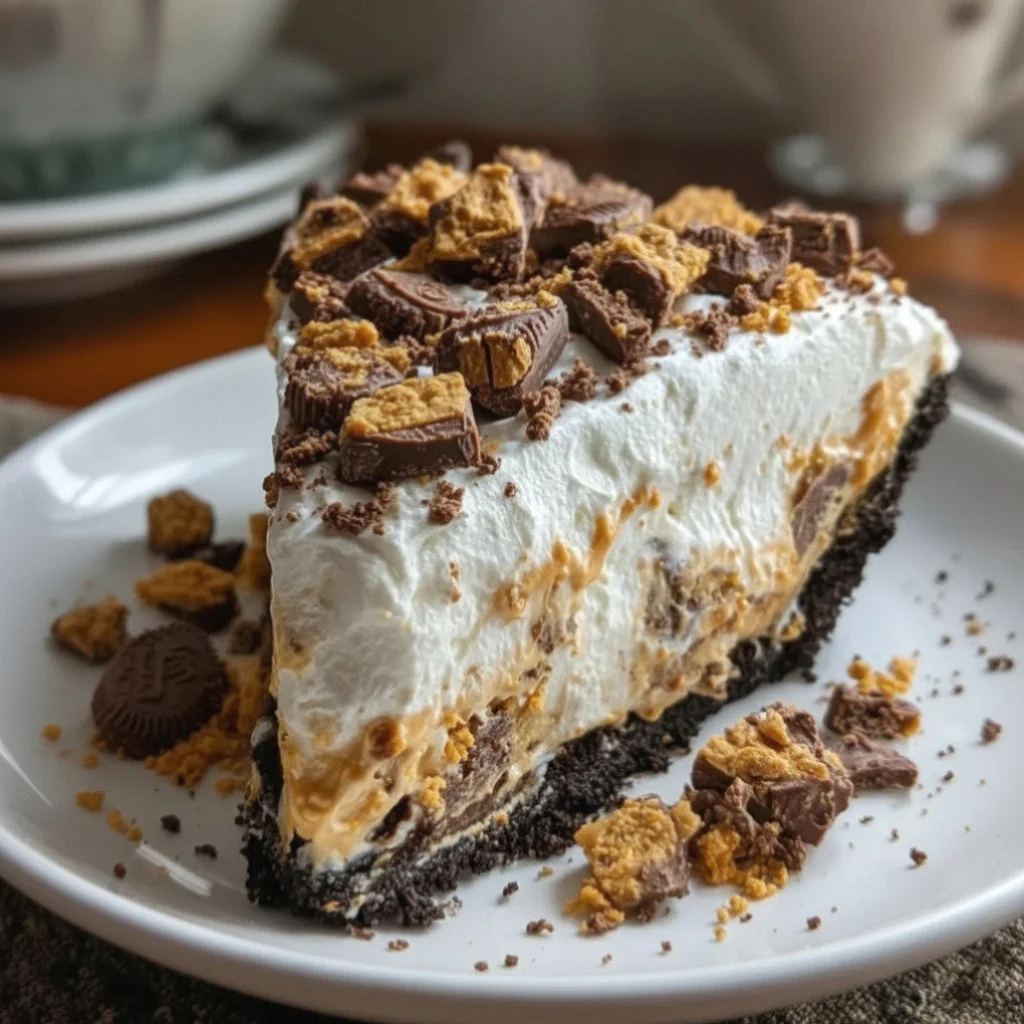
Indulge in the delightful combination of creamy peanut butter and rich chocolate with this irresistible Butterfinger Pie. This no-bake dessert is perfect for parties or special occasions, offering a sweet treat that is sure to impress your family and friends. Whether you’re a fan of chocolate dessert recipes or searching for easy pie recipes, this Butterfinger Pie will satisfy any sweet tooth. The smooth texture paired with the crunch from the Butterfinger bars creates a remarkable contrast that is hard to resist. Plus, it’s a straightforward recipe that yields incredible results with minimal effort, making it a favorite for both novice and experienced bakers alike. The unique blend of flavors in this Butterfinger Pie will leave a lasting impression on anyone you serve it to, ensuring it’s a highlight of your dessert table.
Ingredients
- For the Pie Crust:
- 1 ½ cups graham cracker crumbs – For the best flavor, crush the graham crackers yourself. You can use a food processor or place them in a zip-top bag and crush them with a rolling pin. Freshly crushed crumbs provide a more robust taste than store-bought alternatives.
- ½ cup unsalted butter, melted – Ensure the butter is unsalted to control the seasoning of your pie. Melted butter also helps in binding the crust ingredients together effectively.
- ¼ cup granulated sugar – This adds sweetness and helps bind the crust together. Feel free to adjust the amount based on your preference for sweetness.
- For the Filling:
- 1 (8 oz) package cream cheese, softened – Make sure the cream cheese is at room temperature for easy mixing and a smooth filling. This ensures that there are no lumps in your mixture.
- 1 cup creamy peanut butter – Choose a creamy peanut butter without added sugar or oil for the best consistency and flavor. The peanut butter forms the base of the filling, so quality is essential.
- 1 cup powdered sugar – This will sweeten the filling without making it grainy, creating a smooth mouthfeel. Sifting the powdered sugar can help prevent lumps.
- 1 (8 oz) container whipped topping (like Cool Whip) – This provides lightness to the filling and a contrasting texture. Ensure it is thawed for easy incorporation.
- 1 tsp vanilla extract – Use pure vanilla extract for the best flavor; it enhances the overall taste of the pie. The aroma of vanilla will elevate the dessert’s profile.
- 2 Butterfinger candy bars, crushed – Ensure they are crushed into small pieces to distribute the flavor evenly throughout the filling. The chocolate and peanut butter flavor of the Butterfinger bars will be a delightful addition to the pie.
- For the Topping:
- Additional whipped topping for garnish – A generous dollop on top adds elegance and creaminess. You can pipe it on for a decorative touch.
- Crushed Butterfinger bars for garnish – Sprinkle these on top right before serving for added crunch and visual appeal. This will also give guests a hint of the flavors within the pie.
- Chocolate syrup (optional) – A drizzle of chocolate syrup enhances the dessert’s richness and makes it visually stunning. This can also complement the flavors beautifully.
Steps / Instructions
- Prepare the Pie Crust: In a medium bowl, combine the graham cracker crumbs, melted butter, and granulated sugar. Mix until well combined and the crumbs are evenly moistened. The mixture should resemble wet sand; this indicates that it will hold together properly.
- Form the Crust: Press the crumb mixture firmly into the bottom and up the sides of a 9-inch pie pan. Make sure it’s packed tightly to avoid crumbling later. Use the bottom of a measuring cup for an even surface; this step is crucial for a good base.
- Bake the Crust (Optional): For a firmer crust, preheat your oven to 350°F (175°C) and bake the crust for 8-10 minutes, or until lightly golden. Let it cool completely if you choose to bake it. Baking helps to enhance the flavor and keeps the crust stable, creating a delightful foundation for your Butterfinger Pie.
- Make the Filling: In a large bowl, beat the softened cream cheese until smooth. Use an electric mixer on medium speed to ensure a lump-free mixture. Add in the creamy peanut butter and continue mixing until fully incorporated, achieving a silky texture.
- Sweeten the Mixture: Gradually add the powdered sugar and vanilla extract, mixing until smooth and creamy. Be careful not to overmix to keep the filling light, as overmixing can incorporate too much air. The mixture should be thick yet spreadable.
- Fold in the Whipped Topping: Gently fold the whipped topping into the peanut butter mixture until just combined, creating a light and airy filling. Use a spatula to carefully lift and fold the mixture without deflating it; this step is key to achieving the perfect texture.
- Add the Crunch: Fold in the crushed Butterfinger bars, distributing them evenly throughout the filling. This not only adds flavor but also gives the pie its signature texture; the crunch is a delightful surprise in every bite.
- Fill the Crust: Pour the peanut butter filling into the prepared crust, smoothing the top with a spatula. Make sure to fill all corners of the pie crust for an even distribution; this ensures every slice is equally delicious.
- Chill the Pie: Cover the pie with plastic wrap and refrigerate for at least 4 hours or until firm, preferably overnight for the best results. Chilling helps the flavors meld and the filling to set properly, allowing the Butterfinger Pie to reach its full potential.
- Serve and Garnish: Before serving, top with additional whipped topping and sprinkle the remaining crushed Butterfinger bars on top. Drizzle with chocolate syrup if desired, creating an appealing presentation that will entice your guests to dig in.
Tips & Tricks
- Ingredient Quality: Use high-quality peanut butter for the best flavor. Natural or creamy varieties work best. Avoid using crunchy peanut butter unless you prefer a chunkier filling. Quality ingredients make all the difference in the final taste of your Butterfinger Pie.
- Make Ahead: This Butterfinger Pie can be made a day in advance. Just keep it covered in the fridge, and it will develop even more flavor overnight. The longer it chills, the better the flavors combine, enhancing the overall enjoyment of the dessert.
- Storage: Leftover pie should be stored in an airtight container in the refrigerator and is best consumed within 3-4 days. Avoid leaving it out at room temperature for extended periods, as this can affect the texture and freshness.
- Common Mistakes: Be sure your cream cheese is softened; otherwise, it can create lumps in your filling. Also, avoid overmixing the whipped topping to maintain a light texture. Always taste as you go for optimal sweetness, ensuring your Butterfinger Pie is perfect.
- Serving Temperature: Let the pie come to room temperature for about 15-20 minutes before serving for the best flavor and texture. This allows the filling to soften slightly, enhancing its creamy consistency and making it even more enjoyable.
Variations
There are plenty of ways to customize your Butterfinger Pie: You can learn more about this topic. With a few simple changes, you can make this dessert your own!
- Chocolate Crust: Use a chocolate cookie crust instead of a graham cracker crust for an extra chocolatey experience. This will enhance the chocolate flavor and complement the filling beautifully, making it even more decadent.
- Vegan Option: Substitute the cream cheese with vegan cream cheese, and use a plant-based whipped topping. Opt for a vegan buttery spread in the crust. This way, everyone can enjoy the deliciousness of this Butterfinger Pie!
- Flavor Variations: Experiment with other chocolate candy bars like Reese’s Pieces or Snickers for an exciting twist on the classic flavor. You could also add a layer of chocolate ganache on top for a decadent touch that elevates the dessert.
Butterfinger Pie
Indulge in the delightful combination of creamy peanut butter and rich chocolate with this irresistible Butterfinger Pie. This no-bake dessert is perfect for parties or special occasions, offering a sweet treat that is sure to impress your family and friends. Whether you’re a fan of chocolate dessert recipes or searching for easy pie recipes, this Butterfinger Pie will satisfy any sweet tooth. The smooth texture paired with the crunch from the Butterfinger bars creates a remarkable contrast that is hard to resist. Plus, it's a straightforward recipe that yields incredible results with minimal effort, making it a favorite for both novice and experienced bakers alike. The unique blend of flavors in this Butterfinger Pie will leave a lasting impression on anyone you serve it to, ensuring it's a highlight of your dessert table.
Ingredients
- 1 ½ cups graham cracker crumbs
- ½ cup unsalted butter, melted
- ¼ cup granulated sugar
- 1 (8 oz) package cream cheese, softened
- 1 cup creamy peanut butter
- 1 cup powdered sugar
- 1 (8 oz) container whipped topping (like Cool Whip)
- 1 tsp vanilla extract
- 2 Butterfinger candy bars, crushed
- Additional whipped topping for garnish
- Crushed Butterfinger bars for garnish
- Chocolate syrup (optional)
Directions
In a medium bowl, combine the graham cracker crumbs, melted butter, and granulated sugar. Mix until well combined and the crumbs are evenly moistened.
Press the crumb mixture firmly into the bottom and up the sides of a 9-inch pie pan.
For a firmer crust, preheat your oven to 350°F (175°C) and bake the crust for 8-10 minutes, or until lightly golden. Let it cool completely if you choose to bake it.
In a large bowl, beat the softened cream cheese until smooth. Add in the creamy peanut butter and continue mixing until fully incorporated.
Gradually add the powdered sugar and vanilla extract, mixing until smooth and creamy.
Gently fold the whipped topping into the peanut butter mixture until just combined.
Fold in the crushed Butterfinger bars, distributing them evenly throughout the filling.
Pour the peanut butter filling into the prepared crust, smoothing the top with a spatula.
Cover the pie with plastic wrap and refrigerate for at least 4 hours or until firm.
Before serving, top with additional whipped topping and sprinkle the remaining crushed Butterfinger bars on top. Drizzle with chocolate syrup if desired.
Recipe Reviews
- ★★★★★
Excellent recipe!
Leave a Reply
Your email address will not be published. Required fields are marked *


Excellent recipe!