Dream Pavlova

Introduction
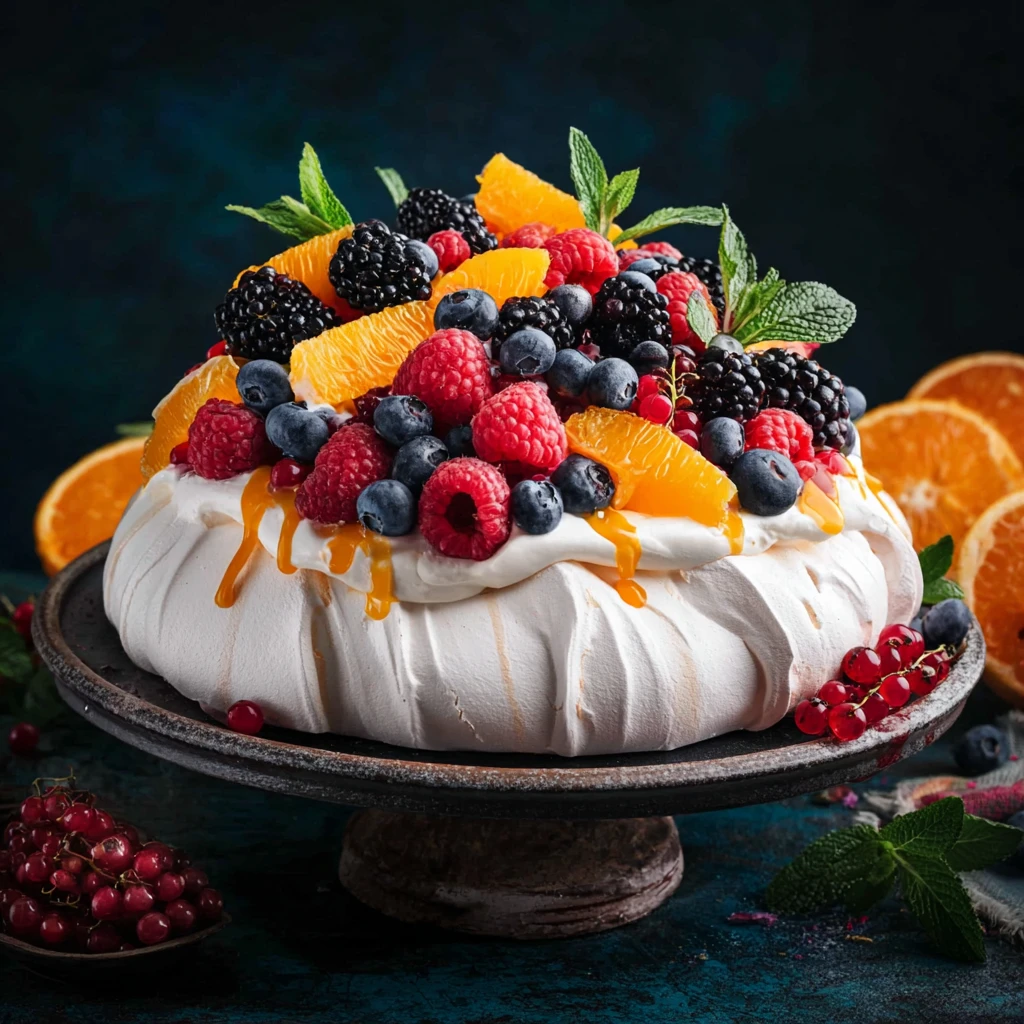
Imagine a dessert that is as light as a cloud, with a crispy outer shell that gives way to a marshmallow-like interior, topped with a luscious layer of whipped cream and fresh fruits. This is the magic of Dream Pavlova, a dessert that is not only visually stunning but also a delight to the taste buds. In this article, we will explore the art of creating the perfect Dream Pavlova and why this recipe holds a special place in the hearts of many dessert enthusiasts.
Originating from Australia or New Zealand (the exact birthplace is a subject of friendly debate), Dream Pavlova is named after the famous Russian ballerina Anna Pavlova. Its creation is often credited to honor her visit to the region during the 1920s, with its light and airy texture symbolizing the grace and elegance of a ballerina.
What sets Dream Pavlova apart is its versatility and simplicity. With just a handful of ingredients, you can create a stunning dessert that is perfect for any occasion, from a casual family gathering to an elegant dinner party. Let’s dive into why this recipe is a must-try for both novice and experienced bakers alike.
Join us on a culinary journey as we uncover the secrets to mastering the art of Dream Pavlova and learn why this dessert has captured the hearts of food lovers around the world.
Why You’ll Love This Recipe
If you’re looking for a dessert that is both impressive and easy to make, Dream Pavlova is the perfect choice. Its crispy exterior and soft, chewy interior create a delightful contrast of textures that will leave you craving for more. Additionally, this recipe is naturally gluten-free, making it a great option for those with dietary restrictions.
One of the best things about Dream Pavlova is its versatility. You can customize it with your favorite toppings, from fresh berries and tropical fruits to chocolate shavings and caramel sauce. The possibilities are endless, allowing you to get creative and tailor this dessert to suit your taste preferences.
Whether you’re a seasoned baker looking to impress your guests or a beginner wanting to try your hand at a show-stopping dessert, Dream Pavlova is a recipe that guarantees success. With its simple ingredients and straightforward instructions, you’ll be amazed at how easy it is to create a dessert that looks and tastes like a work of art.
Get ready to fall in love with Dream Pavlova and discover why it has become a beloved classic in the world of desserts.
Ingredients
To create the perfect Dream Pavlova, you will need the following ingredients:
– 4 large egg whites, at room temperature
– 1 cup granulated sugar
– 1 teaspoon white vinegar
– 1 teaspoon cornstarch
– 1 teaspoon vanilla extract
– Whipped cream, for topping
– Fresh fruits (such as strawberries, kiwi, and passion fruit), for garnish
Feel free to experiment with different fruits and flavorings to customize your Dream Pavlova to your liking. You can also substitute the white vinegar with lemon juice for a slightly tangy twist.
Step-by-Step Instructions
1. Preheat your oven to 250°F (120°C) and line a baking sheet with parchment paper.
2. In a clean, dry bowl, beat the egg whites on medium speed until soft peaks form.
3. Gradually add the sugar, one tablespoon at a time, while continuing to beat the egg whites until stiff, glossy peaks form.
4. Gently fold in the vinegar, cornstarch, and vanilla extract until well combined.
5. Spoon the meringue mixture onto the prepared baking sheet, forming a circle with slightly raised edges.
6. Place the baking sheet in the oven and immediately reduce the temperature to 200°F (100°C). Bake for 1.5 hours, then turn off the oven and let the Pavlova cool completely inside the oven.
7. Once cooled, top the Pavlova with whipped cream and fresh fruits before serving.
Enjoy your homemade Dream Pavlova with family and friends!
Expert Tips for Success
– Use room temperature egg whites for better volume and stability in the meringue.
– Ensure that your mixing bowl and beaters are clean and free of any grease, as any residue can prevent the egg whites from properly whipping.
– Adding sugar gradually helps create a stable meringue that holds its shape when baked.
– For extra flavor, you can add a hint of almond extract or rose water to the meringue mixture.
Variations and Substitutions
If you’re looking to switch things up, here are some creative variations and substitutions you can try with your Dream Pavlova:
– Chocolate Lover’s Dream: Drizzle melted chocolate over the whipped cream and fruit toppings for a decadent twist.
– Tropical Paradise: Top your Pavlova with a mix of mango, pineapple, and toasted coconut for a taste of the tropics.
– Nutty Delight: Fold chopped nuts like almonds or pistachios into the meringue mixture for added crunch and flavor.
Feel free to experiment with different flavor combinations and toppings to create a Dream Pavlova that suits your preferences.
Serving Suggestions
To serve your Dream Pavlova in style, consider the following suggestions:
– Serve slices of Pavlova on individual plates garnished with a dollop of whipped cream and a colorful array of fresh fruits.
– Pair your Pavlova with a light and refreshing fruit coulis or a drizzle of honey for an extra touch of sweetness.
– For a special occasion, accompany your Pavlova with a glass of sparkling wine or champagne to elevate the dining experience.
Get creative with your presentation and enjoy the delicious flavors and textures of your homemade Dream Pavlova.
FAQs
Q: Can I make the Pavlova ahead of time?
A: Yes, you can bake the Pavlova a day in advance and store it in an airtight container at room temperature until ready to serve.
Q: Why did my Pavlova collapse after baking?
A: Overmixing the meringue, opening the oven door too soon, or baking at a high temperature can cause the Pavlova to collapse. Follow the recipe instructions carefully for best results.
Q: Can I freeze leftover Pavlova?
A: While Pavlova is best enjoyed fresh, you can freeze any leftovers in an airtight container for up to 2 weeks. Thaw in the refrigerator before serving.
Experiment with different toppings and flavors to create your perfect Dream Pavlova and enjoy this delightful dessert with your loved ones.
Final Thoughts
As you embark on your Dream Pavlova baking adventure, remember that the key ingredient is love. This dessert is not just a treat for the taste buds but a masterpiece that reflects your creativity and passion for baking. Whether you’re serving it at a special celebration or simply indulging in a slice on a cozy evening, Dream Pavlova has a way of bringing joy to every bite.
So, gather your ingredients, preheat your oven, and let the magic of Dream Pavlova unfold in your kitchen. With each airy bite and burst of fruity flavor, you’ll understand why this dessert holds a special place in the hearts of dessert lovers worldwide. Happy baking!
Dream Pavlova
A light and airy dessert with a crispy exterior, marshmallow-like interior, topped with whipped cream and fresh fruits. Dream Pavlova is a visually stunning and delicious treat perfect for any occasion.
Ingredients
- 4 large egg whites, at room temperature
- 1 cup granulated sugar
- 1 teaspoon white vinegar
- 1 teaspoon cornstarch
- 1 teaspoon vanilla extract
- Whipped cream, for topping
- Fresh fruits (such as strawberries, kiwi, and passion fruit), for garnish
Directions
- Preheat your oven to 250°F (120°C) and line a baking sheet with parchment paper.
- In a clean, dry bowl, beat the egg whites on medium speed until soft peaks form.
- Gradually add the sugar, one tablespoon at a time, while continuing to beat the egg whites until stiff, glossy peaks form.
- Gently fold in the vinegar, cornstarch, and vanilla extract until well combined.
- Spoon the meringue mixture onto the prepared baking sheet, forming a circle with slightly raised edges.
- Place the baking sheet in the oven and immediately reduce the temperature to 200°F (100°C). Bake for 1.5 hours, then turn off the oven and let the Pavlova cool completely inside the oven.
- Once cooled, top the Pavlova with whipped cream and fresh fruits before serving.
- Enjoy your homemade Dream Pavlova with family and friends!